
Short of mashing our food or cooking it over an open fire, the Earth Oven is the oldest cooking method known to humankind. Evidence of their use goes back tens of thousands of years, and they can be found all over the world across nearly all cultures.
The exact construction can vary, but the basic design is the same. Dig a pit in the ground, line it with stones, get those stones blazing hot, then put some food in and bury it! This method can bake, smoke, or steam food. It’s not as much work as it seems, and it makes for a exciting cooking experience that’s great for parties and summer barbecues especially.
Not only is it fun, it imparts a unique flavor to the food that’s cooked inside one that can only be described as “earthy” and makes any other food I’ve heard called “earthy” before this seem like a lie. Soil infused? This stuff tastes like it was cooked inside the earth, because it was!
If you’re interested in new and interesting ways to cook your food, you cannot beat an Earth Oven.

STEP ONE: DIG A HOLE IN THAT EARTH


Simple as it sounds. Dig a pit about 1-1 1/2 feet deep, with relatively straight walls. The pit doesn’t have to be very big, only a little bigger than what you want to cook. I’m not ready to roast pigs here, so mine is about 1×2.5 feet.
BE SURE TO SAVE THE REMOVED SOIL FOR LATER.


A true prehistoric pit would have stones, but alas I’m not in a forest. I live in the middle of the city, so I use what’s available. Bricks it is. Use your authentic stones or fake-ass bricks, whichever you’re using, to smooth the floor of the pit into something relatively flat.
STEP TWO: LINE THE OVEN WITH STONES
The rocks are going to be the heat source which makes this oven work. Be careful not to use river or stream stones, as I’ve heard excess water can explode under the high heats they’ll be exposed to.


Start out laying one piece of floor and one piece of wall to make sure your design will work.
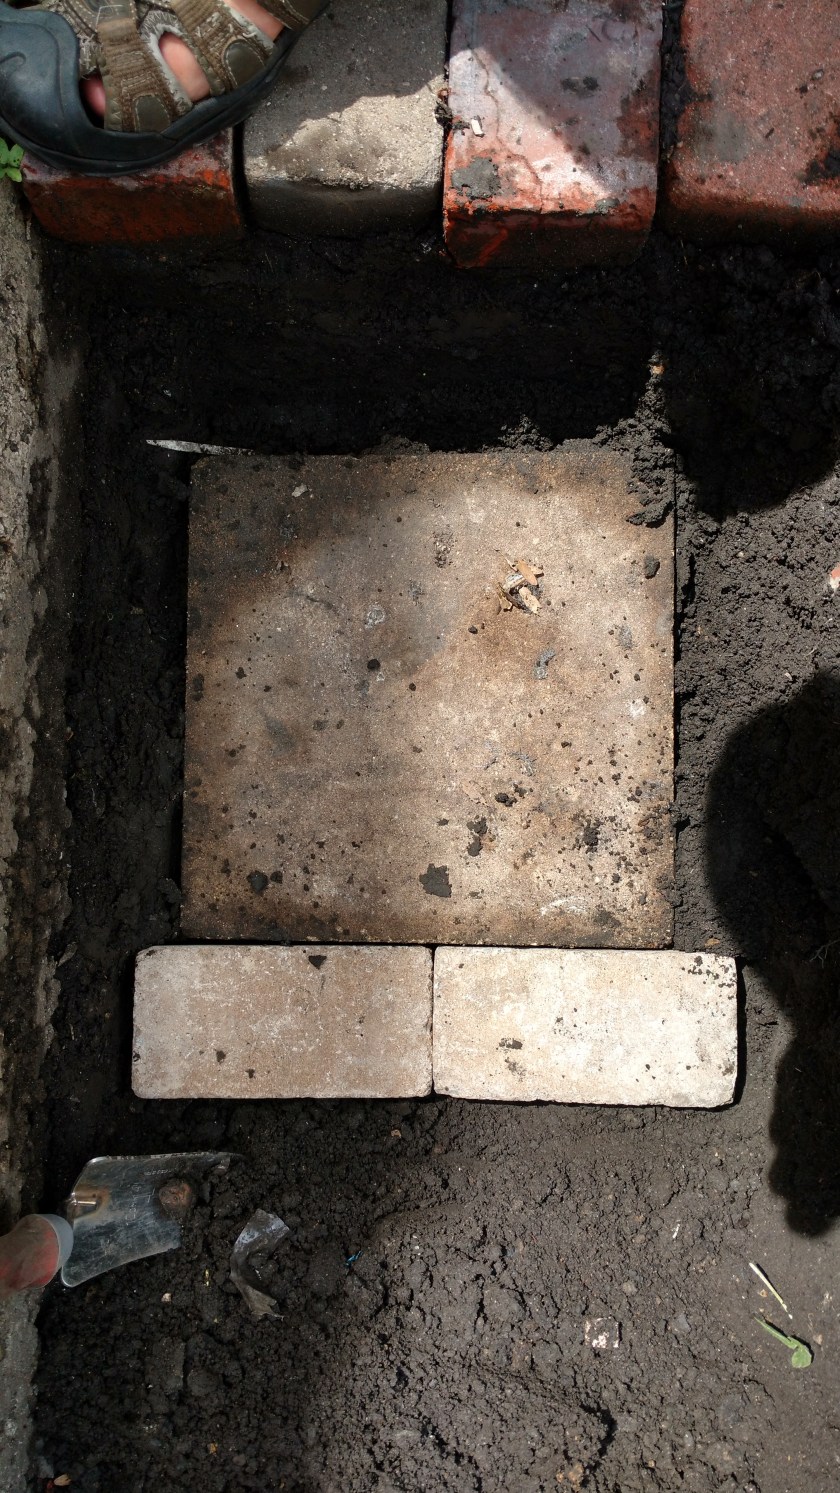
The finished floor. Two bricks and a nice big flat one I found under my porch.


Lining the wall of the pit with bricks and stones.
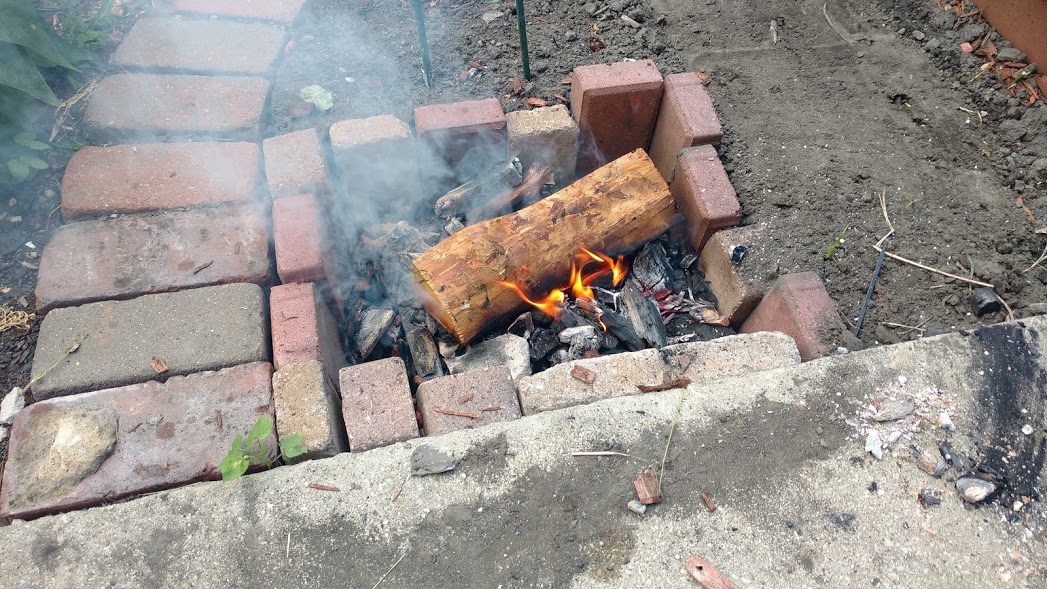
STEP THREE: BUILD A FIRE
Time to cook!
Get a small fire going that will cover most or all of the floor of your oven. You can do this the old fashioned way with small wood chips and kindlin, but if you’re lazy like me, you can simply light up a chimney of wood charcoal, dump it inside, and then toss a couple logs on it.


You want to keep this fire burning for at least 45 minutes. Feed some wood chips or dry mulch to the fire to keep it going during this time. Then, you’ll want to let it smolder down to ash and tiny tiny coals. Another 20-25 minutes, for just over an hour total of fire time.


Roasting some eggplants to pass the time.

Now we’re cooking with gas.
STEP FOUR: REMOVE ALL THE ASH AND DEBRIS
The stones have all the heat now. Unless you’re following a recipe for smoking something, you don’t want any actual wood or ash touching your food. Either scrape it all to one side if you’ve got room, or Scoop it out. I like to move mine into my weber grill for easy extinguishing and disposal. Or you can use the ashes to bury some dough and make ash bread! (Recipe coming soon.


Can’t tell in this picture, but these stones are blazing hot!
STEP FIVE: ADD YOUR FOOD AND BURY IT
The stones are so hot in fact, that if you put your food directly on them, it will burn. Cultures who cook with Earth Ovens all use some kind of insulator for the food to prevent this. The south pacific is famous for using banana leaves, and of course the corn husks containing tamales have their roots in ancient Mesoamerican ovens, but this is where you can really get creative. Any kind of edible leaves or vegetation will work, and even impart some of it’s flavor into the food.

Some insulators I have around my garden. FROM TOP LEFT: Cabbage leaves, carrot tops, beet leaves. BOTTOM: Bolted Arugula that’s gone to seed.


Cabbage leaves down, veggies in (in this case Cauliflower, carrots, beets, onion, garlic, turnip, bell pepper, and sweet potato), Greens on top. Cover with a piece of plywood, and bury it with the soil you saved from digging the pit. You did keep your soil right?


Seared lamb and aromatics, wrapped in beet leaves and corn husks. Stuffed fish and root vegetables. These are just a couple inauthentic examples. Check out the recipes section for authentic, ancient recipes to cook in your Earth oven (Coming soon!)
STEP SIX: WAIT

Exact cooking time may vary, depending on the type of stones, how hot and how long was the fire, and any other variables, but I’ve found that most of the time my oven works at a low and slow 200F or so. It holds the heat for a long time though. Most recipes are 3-4 hours, but you have to experiment (Or follow upcoming recipes) to find the exact sweet spot. Start out with forgiving items like roast veggies or meat cut into smaller pieces until you get a feel for your new Earth Oven.
STEP SEVEN: UNCOVER AND EAT
At last. Gather the family and guests around. It’s time to get the shovel back out and dig out your food. Be careful not to let all the dirt in on top of the food like I did here.


Still hot inside. Have fun and enjoy!
